
TL;DR:
- Home composting transforms household organic waste into nutrient-rich soil naturally and sustainably. It requires balancing green and brown materials, maintaining moisture, and regularly turning the pile for optimal results. Starting small and observing the process helps achieve healthy, finished compost with minimal effort.
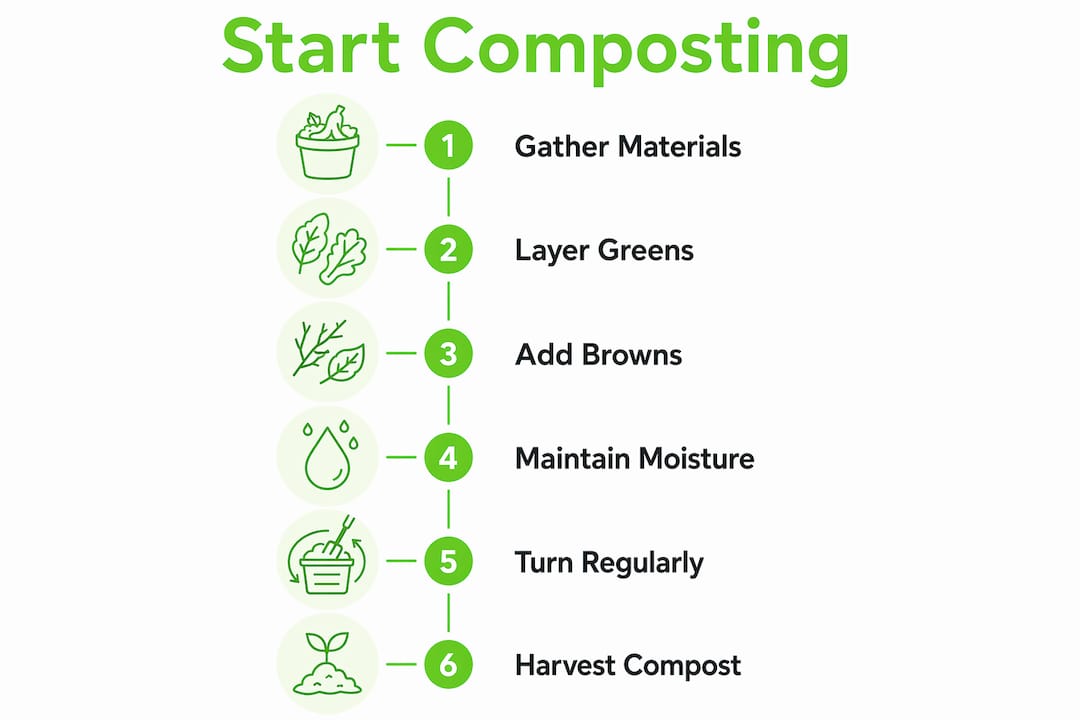
Home composting is the controlled decomposition of organic household waste into nutrient-rich compost, right in your own garden or kitchen. The Royal Horticultural Society endorses it as one of the most effective ways to reduce landfill waste and improve soil health simultaneously. Done well, it turns vegetable peelings, cardboard, and garden trimmings into a free, natural fertiliser. This guide covers everything you need to know, from choosing the right materials and bin to troubleshooting common problems, so you can start composting at home with confidence.
How to start home composting: what goes in and what stays out
The foundation of successful composting is understanding two categories of material: “greens” and “browns.” Greens are nitrogen-rich and include fruit and vegetable scraps, coffee grounds, grass clippings, and fresh plant trimmings. Browns are carbon-rich and include cardboard, dry leaves, straw, paper bags, and woody stems.
The correct balance matters. A ratio of 2–3 parts browns to 1 part greens is the standard recommended by the US EPA’s 2026 guidance for a healthy, active pile. Too many greens and your pile turns slimy and smelly. Too many browns and it dries out and stops breaking down.
Some materials must stay out entirely:
- Meat, fish, and dairy products (attract pests and create foul odours)
- Diseased plants (pathogens can survive and spread back into your garden)
- Pet waste (carries harmful bacteria)
- Cooked food with oils or sauces (slows decomposition and draws rodents)
- Glossy or treated paper (contains chemicals that harm soil microbes)
Pro Tip: Always cover fresh food scraps with 4–8 inches of brown material. This single habit deters pests and prevents the most common beginner odour problems.
Compost accelerators are generally unnecessary. Microorganisms naturally present in your garden soil complete the process without extra products, provided you maintain the right ratio and aeration.
What type of compost bin or heap should you choose?
The right setup depends on your space, budget, and how much organic waste your household generates. Each option has clear trade-offs.
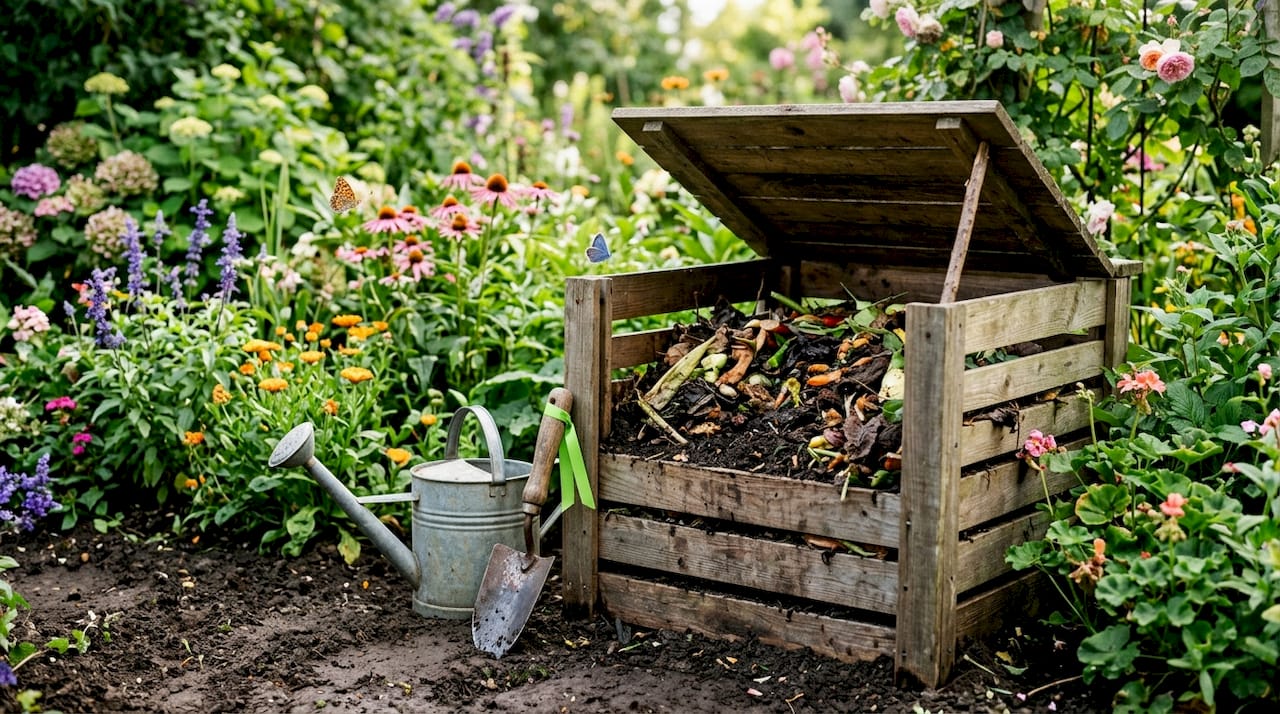
- Plastic compost bins are the most common choice for small gardens. They retain heat and moisture well, deter pests, and are widely available. They suit households producing moderate amounts of kitchen and garden waste.
- Wooden pallet bins are inexpensive to build and allow good airflow. They work well for larger gardens with plenty of brown material like leaves and prunings.
- Mesh-lined bins are best for composting leaves and light garden waste. They allow maximum airflow but lose heat quickly, making them better suited to cold composting.
- Vermicomposting containers use worms to break down kitchen scraps rapidly. They are ideal for flats or homes without a garden, and they produce a particularly rich liquid feed alongside solid compost.
Size matters more than most beginners expect. A pile roughly one cubic yard in volume is the practical sweet spot. Smaller piles fail to retain enough heat for active decomposition. Larger piles become difficult to turn and manage.
Place your bin on bare soil rather than concrete or paving. Direct contact with the ground gives worms, beetles, and beneficial microbes access to your pile from below. Choose a spot with partial shade and shelter from strong winds, close enough to your kitchen door that adding scraps does not feel like a chore.
Pro Tip: Add a few shovelfuls of finished compost or garden soil when you first set up your bin. This introduces beneficial microbes immediately and gives decomposition a head start.
How do you build and maintain a healthy compost pile?
Building the pile correctly from the start saves a great deal of troubleshooting later. Follow these steps:
- Start with a brown base. Lay 10–15 cm of coarse brown material, such as twigs or straw, at the bottom. This creates drainage and airflow from the outset.
- Add a green layer. Place 5–8 cm of nitrogen-rich material on top. Kitchen scraps, fresh grass clippings, or coffee grounds all work well here.
- Cover with browns. Add another 10–15 cm layer of dry leaves, cardboard, or paper. This is the critical pest-deterrent step.
- Repeat the layering. Continue alternating greens and browns as you add material over the following weeks.
- Water if needed. The pile should feel like a wrung-out sponge. Squeeze a handful of material. If water drips freely, it is too wet. If it crumbles and feels dry, add water.
- Turn the pile regularly. Use a fork or compost aerator to mix the pile thoroughly. Turn every 5 days, or at minimum every 1–3 weeks, to maintain oxygen levels and speed decomposition.
Understanding hot versus cold composting
The method you use determines how quickly you get finished compost. The hot pile method produces finished compost in 3–6 months. Hot piles heat to 130°F–160°F internally, which destroys weed seeds and pathogens. Achieving this requires the correct green-to-brown ratio, adequate moisture, and frequent turning.
Cold composting requires far less effort. You simply add material as it becomes available and leave it to break down slowly. The trade-off is time. Cold piles take a year or more to produce usable compost, and they do not reliably kill weed seeds.
Compost piles go dormant below 10°C, so expect slower progress through winter months. Turning the pile frequently during the first 3–4 weeks of the active season makes a measurable difference to the final timeline.
Troubleshooting common problems
Most composting problems have a straightforward fix once you know what to look for:
- Rotten egg smell: This signals anaerobic conditions. A sulphurous odour means the pile lacks oxygen. Turn it immediately and add more browns.
- Ammonia smell: Too many greens. Add carbon-rich browns and turn the pile.
- Pile not heating up: Either too dry, too small, or lacking nitrogen. Add greens and water, then turn.
- Pests or flies: Food scraps are exposed. Bury them deeper and cover with a thick layer of browns.
- Slimy, wet texture: Excess moisture or too many greens. Add dry cardboard or leaves and turn thoroughly.
Oxygen is the element most often neglected by beginners. Without it, piles turn anaerobic and emit methane, a potent greenhouse gas. Regular turning is the single most effective maintenance habit you can build.
How do you know when compost is ready to use?
Finished compost has three clear signs: a dark brown or near-black colour, a crumbly texture that falls apart easily, and an earthy smell similar to potting soil. If you can still identify the original materials, the compost needs more time.
Typical timelines vary by method. Hot composting delivers results in 3–6 months. Cold composting takes 12 months or longer. Vermicomposting sits in between, often producing usable material in 2–3 months with active worm populations.
Before using compost, screen it through a coarse garden sieve to remove any unfinished chunks. Return those chunks to the active pile. You can use finished compost in several ways:
- Soil amendment: Dig 5–8 cm into vegetable beds before planting to improve structure and fertility.
- Mulch: Spread 3–5 cm around established plants to retain moisture and suppress weeds.
- Potting mix ingredient: Blend with topsoil and grit for a free, nutrient-rich growing medium.
- Lawn top dressing: Apply a thin layer in spring to feed grass naturally.
Store any surplus compost in a covered bin or bag to prevent nutrient loss from rain. For more ideas on putting kitchen scraps to work, the Naturessoulshop guide on composting kitchen scraps covers soil-building techniques in practical detail.
Pro Tip: Sieve your compost before use and return unfinished material to the pile. This improves finished compost quality and keeps your pile active rather than starting from scratch.
Key takeaways
Home composting succeeds when you balance greens and browns correctly, maintain moisture like a wrung-out sponge, and turn the pile regularly to keep it aerobic.
| Point | Details |
|---|---|
| Balance greens and browns | Use a 2–3:1 ratio of browns to greens for active, odour-free decomposition. |
| Choose the right bin size | Aim for roughly one cubic yard; smaller piles lose heat and decompose slowly. |
| Turn the pile consistently | Turn every 5 days to 3 weeks to maintain oxygen and prevent methane production. |
| Recognise finished compost | Look for dark colour, crumbly texture, and an earthy smell before applying to soil. |
| Skip the accelerators | Natural microbes do the work; correct ratios and aeration are all you need. |
Composting is simpler than you think: my honest view
Most people overthink home composting before they even start. I did too. The first time I set up a bin, I spent more time reading about carbon-to-nitrogen ratios than actually adding material to the pile. The truth is that composting is more an art than an exact science, and the best results come from observation, not from measuring every handful.
What actually changed my results was treating the compost pile like a houseplant. I started checking it every few days rather than every few weeks. I noticed when it smelled off, when it looked too dry, when it had gone quiet and cold. Those small, regular checks let me correct problems early, before they became frustrating setbacks.
The other thing I wish someone had told me earlier: start small. A single plastic bin in a corner of the garden is enough to build real confidence. You do not need a three-bay system or a thermometer. You need a bin, kitchen scraps, cardboard, and the habit of turning it. Once you see that first batch of dark, crumbly compost, the process clicks. Patience matters more than perfection, especially through the winter months when the pile slows right down. Keep adding material, keep turning when you can, and the results will come.
For anyone who wants to go deeper on the environmental case for composting, the Naturessoulshop article on the importance of composting lays out the wider picture clearly.
— Arjit
Naturessoulshop and your sustainable garden
Composting sits at the heart of organic growing. When your soil is fed naturally, the food it produces is cleaner and more nutritious. At Naturessoulshop, that connection between healthy soil and healthy food runs through everything we stock.

From organic fruits and vegetables to clean-ingredient dry grocery and vegan staples, the Naturessoulshop online store brings together products that align with the same principles you apply in your garden. If you are building a more sustainable kitchen and garden together, browsing the organic food range is a practical next step. Good compost feeds good soil. Good soil grows better food. Naturessoulshop helps you close that loop.
FAQ
What is the easiest composting method for beginners?
Cold composting is the simplest method. Add greens and browns in layers, keep the pile moist, and turn it occasionally. It takes 12 months or more but requires minimal effort.
Can I compost in a small garden or flat?
Yes. Vermicomposting containers work indoors or on a balcony and process kitchen scraps quickly using worms. They take up very little space and produce rich compost and liquid feed.
Why does my compost smell bad?
A rotten egg smell signals anaerobic conditions caused by too little oxygen or too many wet greens. Turn the pile immediately and add a thick layer of dry browns to restore balance.
How often should I turn my compost pile?
Turn the pile every 5 days for hot composting, or every 1–3 weeks for a more relaxed approach. Regular turning maintains oxygen levels and speeds up decomposition significantly.
Can I add cooked food to my compost bin?
Cooked food with oils, meat, fish, or dairy should not go into a standard compost bin. These materials attract pests and create persistent odours. Stick to raw fruit and vegetable scraps for kitchen waste.


