


TL;DR:
- Homemade cleaning recipes offer an effective, cost-efficient alternative to commercial products using common pantry ingredients. Selecting the right formula depends on surface compatibility, cleaning task, and safety precautions to prevent damage or hazards. Proper storage, testing, and gradual adoption ensure a safer, eco-friendly home environment.
If you’ve ever squinted at the ingredient list on a commercial cleaner and felt uneasy, you’re not alone. Homemade cleaning recipes, known more formally as DIY cleaning formulations, offer a genuinely practical alternative. They use ingredients you likely already have, cost a fraction of shop-bought products, and DIY sprays match commercial cleaners’ effectiveness for most household tasks. This guide covers the top recipes worth making, how to choose the right one for each surface, and the safety rules that make all the difference.
Table of Contents
- Key takeaways
- How to choose the right homemade cleaning recipes
- The top 7 homemade cleaning recipes
- Comparing recipes: which one suits your needs?
- Safety precautions for making and using homemade cleaners
- Environmental and health benefits of natural cleaning solutions
- My honest take on going chemical-free at home
- Stock your natural cleaning kit with Naturessoulshop
- FAQ
Key takeaways
| Point | Details |
|---|---|
| Match recipe to surface | Acidic cleaners like vinegar damage granite and marble; always check surface compatibility first. |
| Clean before disinfecting | Removing dirt first allows disinfectants to work properly, following CDC-aligned guidance. |
| Pantry staples do the job | Common ingredients such as vinegar, dish soap, and baking soda cover most household cleaning needs. |
| Test before full use | Always test any new homemade cleaner on a small, hidden area to prevent irreversible damage. |
| Storage and labelling matter | Clearly label bottles with contents and date made; most recipes last two to four weeks. |
How to choose the right homemade cleaning recipes
Not every DIY formula works on every surface. Choosing poorly can scratch, stain, or permanently etch a surface you were trying to clean. Before mixing anything, run through these criteria.
Effectiveness for the task at hand. Think about what you’re actually cleaning. Grease in the kitchen needs a degreaser with surfactants. Bathroom soap scum responds well to acid-based cleaners. Disinfecting a worktop after handling raw meat is a different job entirely from wiping down a window.
Surface compatibility. This is where most people go wrong. Vinegar harms porous stones like granite and marble irreversibly. Non-porous surfaces such as glass, sealed tiles, and stainless steel handle acidic cleaners well. Porous materials, including unsealed wood and natural stone, need pH-neutral formulas.
Ingredient safety and environmental impact. Most DIY ingredients are pantry staples that are biodegradable and low-toxicity. That said, some combinations are dangerous. Mixing vinegar with bleach produces chlorine gas. Mixing bleach with ammonia is equally hazardous. Stick to one active ingredient per bottle.
Ease of preparation. If a recipe requires ten steps and specialist equipment, you won’t make it again. The best eco-friendly cleaning recipes take under five minutes to prepare.
When to use commercial products instead. DIY cleaners are not always the right choice. For mould remediation, heavily contaminated surfaces, or situations requiring EPA-registered disinfectants, a certified product is the safer option. EPA Safer Choice certified products meet both environmental and performance standards when you need that assurance.
Pro Tip: Keep a dedicated spray bottle for acidic cleaners (vinegar-based) and a separate one for soap-based cleaners. Mixing residues from both in the same bottle causes streaking and reduces effectiveness.
The top 7 homemade cleaning recipes
1. Dish soap all-purpose cleaner
This is the workhorse of easy homemade cleaners. Mix two cups of warm water with half a teaspoon of liquid dish soap and, if you like, ten drops of tea tree or lavender essential oil. Shake gently and spray onto worktops, sinks, appliances, and sealed surfaces.
The caution here is glass. Soap-based cleaners leave a cloudy film on mirrors and windows, so keep this bottle away from glass surfaces. Also avoid using it on unsealed wood, as the moisture can warp the grain over time.
2. Vinegar and citrus all-purpose cleaner
Fill a glass jar with white vinegar and add the peels of two or three citrus fruits. Lemon, orange, and grapefruit all work well. Leave it to infuse for two weeks, then strain and dilute with equal parts water in a spray bottle.
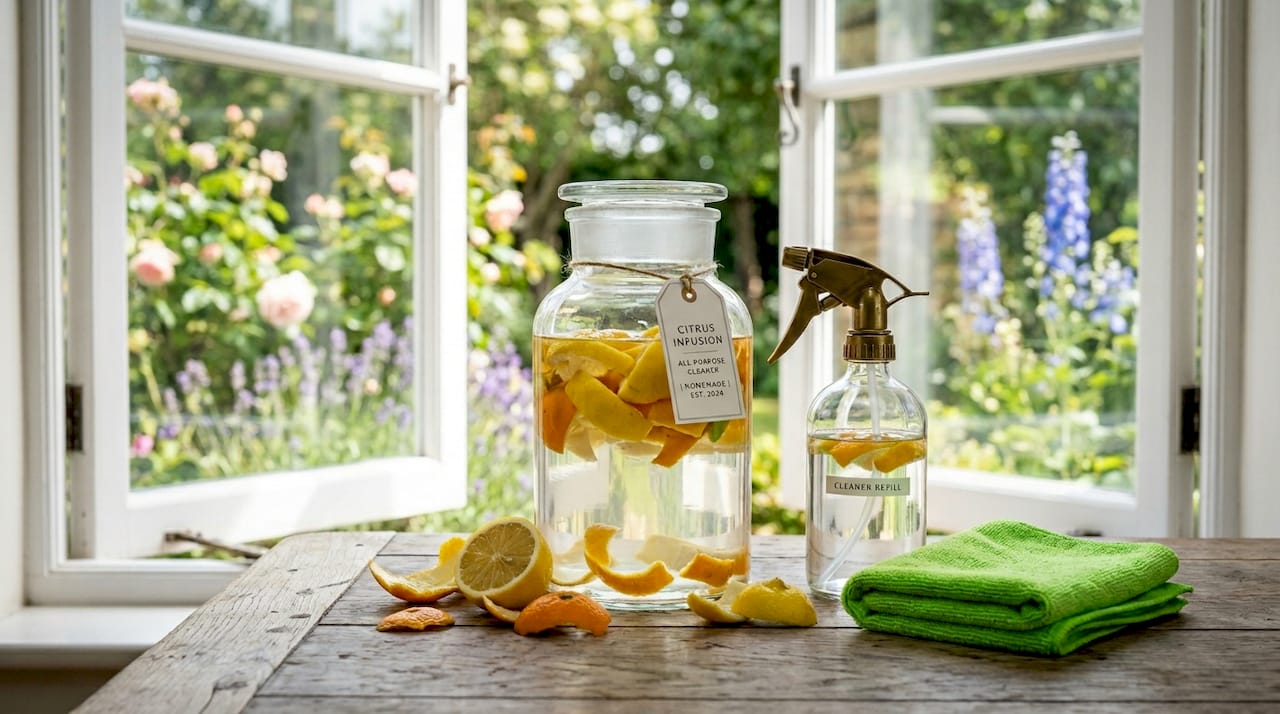
The citrus oils boost the degreasing power and leave a genuinely pleasant scent. Use this on sealed tiles, stainless steel, microwaves, and most kitchen surfaces. Skip it entirely on granite, marble, or any natural stone.
3. Streak-free glass cleaner
Combine one cup of water, one cup of rubbing alcohol (70% isopropyl), and one tablespoon of white vinegar in a spray bottle. Spray onto glass and wipe with a microfibre cloth in circular motions.
This formula evaporates quickly, which is exactly why it leaves no streaks. It works brilliantly on windows, mirrors, and glass splashbacks. The alcohol also provides mild disinfecting properties as a bonus.
Pro Tip: Apply this glass cleaner on a cloudy day rather than in direct sunlight. Sunlight causes the solution to dry too fast, which creates streaks before you can wipe them away.
4. Natural stone cleaner
Natural stone needs a pH-neutral cleaner. Mix two cups of warm water with a few drops of mild, unscented castile soap. That’s it. No vinegar, no lemon, no baking soda.
This recipe is intentionally simple because the goal is to clean without reacting with the stone’s minerals. Wipe with a soft cloth, then dry the surface immediately. Leaving moisture on stone can cause watermarks or, over time, surface damage.
5. Multipurpose kitchen degreaser
This one earns its place in any kitchen. Mix one cup of warm water, a quarter cup of castile soap, and two tablespoons of baking soda in a bowl, then transfer carefully to a spray bottle. The baking soda acts as a mild abrasive while the castile soap cuts through grease.
Use it on hob surrounds, extractor fan filters, oven doors, and greasy worktops. Let it sit for two to three minutes on heavy grease before wiping. Rinse with a damp cloth afterwards to remove any baking soda residue.
6. Bathroom disinfecting cleaner
Mix three quarters of a cup of water with a quarter cup of isopropyl alcohol (at least 70% concentration) and one tablespoon of white vinegar. Add five drops of tea tree essential oil if you have it.
This formula handles toilet seats, sink surrounds, and taps well. For genuine disinfection, clean the surface first with soap and water to remove visible soil, then apply this spray and leave it wet for at least thirty seconds before wiping. Skipping the cleaning step first means the disinfectant is fighting through grime rather than working on the surface itself.
7. Homemade laundry detergent
Combine one cup of washing soda, one cup of bicarbonate of soda, and half a cup of grated castile soap bar. Mix thoroughly and store in an airtight container. Use two tablespoons per wash load.
You can add half a cup of borax for extra cleaning power on heavily soiled items, though it is optional. Homemade laundry detergent using washing soda costs a fraction of commercial brands and covers a substantial number of wash loads from a single batch.
Comparing recipes: which one suits your needs?
| Recipe | Best use | Key ingredients | Safe on | Avoid on |
|---|---|---|---|---|
| Dish soap cleaner | General surfaces | Dish soap, water | Sealed surfaces, sinks | Glass, unsealed wood |
| Vinegar citrus cleaner | Kitchen, tiles | Vinegar, citrus peel | Sealed tiles, steel | Granite, marble, stone |
| Glass cleaner | Windows, mirrors | Alcohol, vinegar | Glass, chrome | Porous surfaces |
| Stone cleaner | Natural stone | Castile soap, water | Marble, granite, slate | Acidic or abrasive use |
| Kitchen degreaser | Hobs, ovens | Castile soap, bicarb | Most kitchen surfaces | Delicate coatings |
| Bathroom disinfectant | Toilets, taps | Alcohol, vinegar | Non-porous bathroom surfaces | Natural stone, grout |
| Laundry detergent | Clothing, linens | Washing soda, bicarb | Most fabrics | Delicate silks, wool |
The kitchen is where most people start with natural cleaning solutions, and the vinegar citrus cleaner and degreaser cover the majority of tasks there. Bathrooms are best served by the disinfecting cleaner, but only after a proper soap-and-water clean first. Glass surfaces deserve their own dedicated bottle. Never use a general-purpose spray on windows if it contains soap.
For natural stone surfaces, the neutral castile soap recipe is the only safe choice from this list. Cleaning vinegar must always be diluted and tested before use, and even then it should never touch unsealed stone.
Pro Tip: Make small batches of each recipe and label them with the date. Most water-based DIY cleaners are best used within four weeks. After that, the preserving properties of the alcohol or vinegar begin to diminish.
Safety precautions for making and using homemade cleaners
Getting the recipes right is only half the job. How you handle, store, and apply them matters just as much.
- Always test a new cleaner on a small, hidden area first. A patch test on the inside of a cupboard door takes thirty seconds and can save you from permanent damage to a visible surface.
- Never mix vinegar with bleach or hydrogen peroxide. The chemical reactions produce toxic gases that are harmful even in a ventilated room.
- Proper dilution prevents surface damage when using acidic ingredients. Undiluted vinegar or lemon juice will etch stone and corrode certain metals.
- Store all homemade cleaners in clearly labelled bottles, out of reach of children and pets. Include the ingredients and the date made.
- Use separate spray bottles for acidic and soap-based cleaners. Mixing residues causes streaking and can reduce the effectiveness of both.
- When using essential oils, check pet safety first. Tea tree oil is toxic to cats and dogs even in diluted form.
- For disinfection, surfaces must remain wet with the disinfectant for the full contact time. Wiping immediately after spraying does not disinfect.
“Cleaning and disinfecting are two distinct steps. Cleaning removes visible dirt and reduces germ numbers. Disinfecting kills the remaining germs. Doing both, in that order, is what actually makes a surface safe.” — CDC-aligned guidance
Environmental and health benefits of natural cleaning solutions
Switching to eco-friendly cleaning recipes does more than reduce your chemical exposure. It changes the entire footprint of how you maintain your home.
Conventional cleaning products often contain volatile organic compounds (VOCs), synthetic fragrances, and surfactants that persist in waterways. Homemade formulas using vinegar, bicarbonate of soda, and castile soap biodegrade quickly and do not accumulate in the environment.
The health benefits are equally real. Reduced exposure to harsh chemicals lowers the risk of respiratory irritation, skin sensitisation, and hormonal disruption from compounds found in some commercial cleaners. For households with children, elderly members, or people with allergies, this shift is particularly meaningful.
Cost savings add up faster than most people expect. A litre of white vinegar costs less than a pound. A box of bicarbonate of soda covers dozens of cleaning tasks. You can find trusted pantry staples for cleaning that double as food-grade ingredients, which means nothing in your cupboard is wasted.
Repurposing old cloths as cleaning rags instead of buying disposable wipes reduces plastic waste further. When you do need a commercial product, look for EPA Safer Choice labelling, which confirms the product meets independent environmental and health criteria.
My honest take on going chemical-free at home
I’ll be direct: the first time I switched to homemade cleaners, I expected them to feel like a compromise. They didn’t.
What surprised me most was how quickly I stopped noticing the absence of that sharp chemical smell. Within a week, walking into a freshly cleaned room felt different. Lighter. The citrus vinegar cleaner became a genuine favourite, not because of any ideology, but because it works and smells brilliant.
The challenges were real, though. I ruined a small section of a marble bathroom shelf with an undiluted vinegar spray before I learnt to check surfaces properly. That lesson cost me more than any bottle of commercial cleaner would have. Testing first is not optional advice. It is the rule.
What I’ve found over time is that the biggest barrier to making the switch isn’t the recipes themselves. It’s the habit of reaching for the familiar bottle. Once you have your spray bottles labelled and stocked, the effort is identical. The difference is what you’re putting into your home and down your drains.
I’d also say this: don’t try to replace everything at once. Start with one or two recipes for the surfaces you clean most often. Build confidence there, then expand. Patience with the process matters more than perfection on day one.
— Arjit
Stock your natural cleaning kit with Naturessoulshop
If you’re ready to make the switch to cleaner, safer home care, Naturessoulshop makes it straightforward. As a trusted source for organic and natural products, the range includes everything you need to get started with DIY cleaning formulations.

From natural dishwashing liquids to herbal kitchen sprays and clean-ingredient pantry staples, Naturessoulshop stocks products that align with a genuinely chemical-free lifestyle. Whether you’re sourcing castile soap, looking for a ready-made natural kitchen cleaner, or browsing the full range of home care essentials, everything is formulated with clean, traceable ingredients. Visit Naturessoulshop to explore the complete collection and build a home that’s healthier from the inside out.
FAQ
What are the safest ingredients for homemade cleaning recipes?
White vinegar, bicarbonate of soda, castile soap, and isopropyl alcohol are among the safest and most effective base ingredients. Always dilute acids and avoid mixing vinegar with bleach.
Can vinegar be used on all household surfaces?
No. Vinegar is effective on sealed tiles, glass, and stainless steel, but it permanently damages porous natural stones like granite and marble. Always check surface compatibility before use.
How long do homemade cleaners last?
Most water-based DIY cleaning solutions last between two and four weeks. Alcohol-based formulas last longer. Label each bottle with the date made and discard when the solution looks cloudy or smells off.
Do homemade cleaners actually disinfect?
Some do, partially. Isopropyl alcohol at 70% concentration and certain essential oils have antimicrobial properties. For full disinfection, clean the surface with soap and water first, then apply the disinfecting formula and leave it wet for the full contact time before wiping.
Are homemade cleaning products safe around children and pets?
Most are safer than commercial alternatives, but not all are risk-free. Tea tree oil is toxic to cats and dogs. Borax should be kept away from children. Always store labelled bottles out of reach and check ingredient safety for your specific household.


