
Over eighty percent of British home cooks say they value fresh, nutrient dense ingredients in their daily meals. Yet many overlook the remarkable power of home sprouting, a simple method that can turn everyday seeds into vitamin packed superfoods. Choosing the right seeds and mastering each step of the sprouting process ensures not only safer results but also unbeatable flavour and nutrition. Discover how every careful rinse and observation can transform your kitchen into a haven of vibrant, wholesome sprouts.
Table of Contents
- Stage 1: Select And Rinse Quality Seeds
- Stage 2: Soak Seeds For Proper Hydration
- Stage 3: Drain And Initiate Germination
- Stage 4: Rinse And Drain Regularly
- Stage 5: Assess Sprout Growth And Freshness
Quick Summary
| Essential Insight | Detailed Explanation |
|---|---|
| 1. Choose Untreated Seeds | Always select untreated seeds marketed specifically for sprouting from reputable organic sources to ensure health and safety. |
| 2. Soak in Lukewarm Water | Soak seeds in lukewarm water between 68º to 95ºF for 4 to 8 hours to initiate hydration and stimulate germination. |
| 3. Maintain Cleanliness | Rinse seeds thoroughly at least two to three times daily to prevent mould and ensure successful sprouting. |
| 4. Proper Environment for Germination | Place seeds in a dark area at a consistent temperature of 68º to 70ºF to optimise germination conditions and growth. |
| 5. Assess Sprout Growth Regularly | Monitor sprout development for 2 to 6 days and harvest when sprouts are 1 to 2 centimetres long with a fresh smell. |
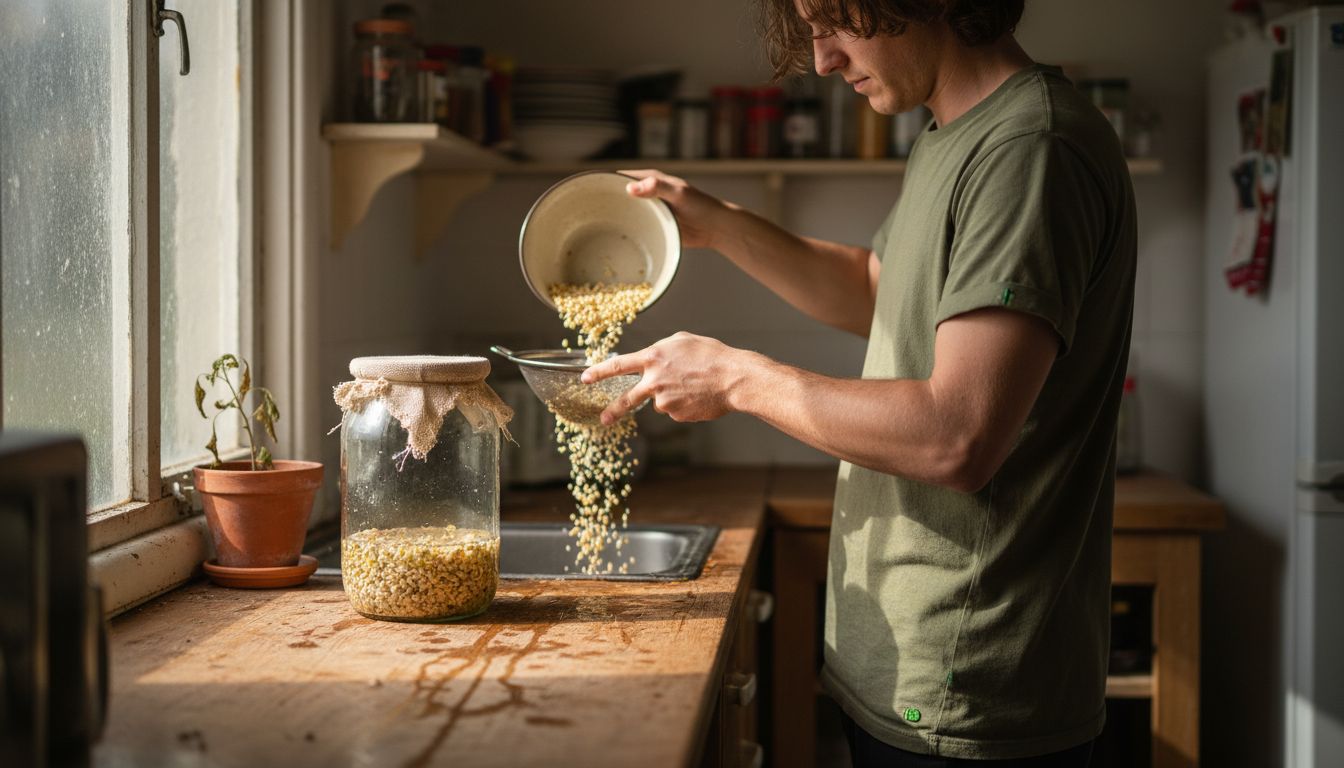
Stage 1: Select and Rinse Quality Seeds
Successfully sprouting seeds begins with choosing pristine, untreated seed varieties and preparing them meticulously for optimal nutrition. Getting this initial stage right sets the foundation for healthy, safe, and delicious sprouts.
Start by selecting untreated seeds specifically intended for sprouting, avoiding any seeds processed with pesticides or chemical treatments. Look for seeds explicitly marketed for sprouting from reputable organic suppliers. When examining your seeds, carefully inspect them for any visible damage, discolouration, or foreign particles that might compromise sprouting quality.
Rinsing requires precision and patience. Use large volumes of potable water and thoroughly wash your seeds multiple times. The goal is crystal-clear rinse water that indicates all debris and potential contaminants have been removed. Hold the seeds in a fine mesh strainer and run cool, clean water over them, gently agitating to dislodge any dirt or impurities.
Warning: Never use seeds treated with agricultural chemicals for sprouting, as these can be harmful when consumed. Your health and safety depend on selecting pure, untainted seeds perfect for germination.
With your seeds now carefully selected and pristinely rinsed, you are ready to move forward to the exciting germination stage.
Stage 2: Soak Seeds for Proper Hydration
Soaking seeds is a crucial preparatory stage that awakens their dormant potential, transforming them from dry kernels into living nutritional powerhouses. This hydration process primes your seeds for successful germination by softening their outer layers and kickstarting essential metabolic processes.
Seeds require precise soaking conditions to achieve optimal water absorption. Different seed varieties have unique hydration requirements, but most benefit from lukewarm water between 68º to 95ºF. For most sprouting seeds, a 4 to 8 hour soak works perfectly. Use a clean glass or ceramic container filled with room temperature filtered water, ensuring seeds are completely submerged.
Temperature matters significantly during soaking. Warmer water around 30°C accelerates water uptake for beans like mung, soybean, and red beans, helping them hydrate more effectively. Avoid using metal containers, as they can interact with the seeds and potentially impact germination quality. After soaking, you will notice seeds looking plumper and slightly swollen.
Warning: Always use clean, filtered water and watch for any signs of seed deterioration during soaking. Discard any seeds that develop an off odour or show signs of mould.
With your seeds now beautifully hydrated and primed for growth, you are ready to progress to the next exciting stage of sprouting.
Stage 3: Drain and Initiate Germination
Germination transforms your soaked seeds into vibrant living sprouts, marking a magical moment in their growth cycle. This critical stage requires precision and patience to encourage healthy, nutrient dense seedlings.
After soaking, carefully drain the water and rinse your seeds thoroughly. Use a fine mesh strainer to ensure complete water removal while preventing seed loss. Position your sprouting container at a gentle angle to distribute seeds evenly, allowing excess moisture to drain naturally. The ideal environment is a dark space maintained at a consistent 68º to 70ºF, which provides optimal conditions for germination.
Choose your sprouting container wisely. Wide mouth glass jars with mesh or cheesecloth covers work brilliantly, allowing air circulation while preventing contamination. Some seeds benefit from gentle pressure during this stage professional sprouters recommend applying a light weight about half an ounce per square inch to encourage uniform growth and prevent seeds from clustering.
Warning: Maintain scrupulous cleanliness throughout the process. Rinse seeds twice daily and ensure proper drainage to prevent mould growth. Any unusual odours or discolouration signal potential bacterial contamination.
With your seeds now positioned perfectly for growth, you are poised to witness the remarkable transformation from dormant seed to living sprout.
Stage 4: Rinse and Drain Regularly
Rinsing and draining are the heartbeat of successful seed sprouting, maintaining the delicate balance of moisture and preventing potential bacterial growth. This crucial stage transforms your dormant seeds into living nutritional powerhouses.
Establish a consistent rinsing routine of two to three times daily over 3 to 5 days. Use cool, clean water and a fine mesh strainer to gently rinse your seeds. The key is thorough rinsing followed by complete drainage to keep sprouts fresh and prevent stagnant moisture that could encourage mould development.
Pay close attention to your sprouting container’s angle during each rinse cycle. Tilt the jar or container to ensure water flows freely, distributing moisture evenly across the seeds. Gentle agitation during rinsing helps prevent seed clustering and promotes uniform growth. Use filtered or purified water to avoid introducing potential contaminants that could compromise your sprouts.
Warning: Watch for any signs of unusual odour, discolouration, or slimy texture. These are immediate red flags indicating potential bacterial contamination. If in doubt, discard the batch and start fresh to ensure your sprouts remain safe and nutritious.
With each careful rinse, you are nurturing your seeds closer to becoming vibrant, nutrient dense sprouts ready to elevate your culinary and nutritional experience.
Stage 5: Assess Sprout Growth and Freshness
Assessing your sprouts marks the culmination of your careful nurturing process, transforming tiny seeds into vibrant nutritional powerhouses. This final stage determines the perfect moment to harvest and savour your homegrown sprouts.
Continue rinsing and draining your seeds for 2 to 6 days, monitoring their growth carefully. Different seed varieties develop at unique rates some will reach optimal size in just a few days, while others might require a week. Look for sprouts with small white or pale green shoots, typically measuring 1 to 2 centimetres in length. A good indicator of readiness is when the sprout length matches the original seed size.
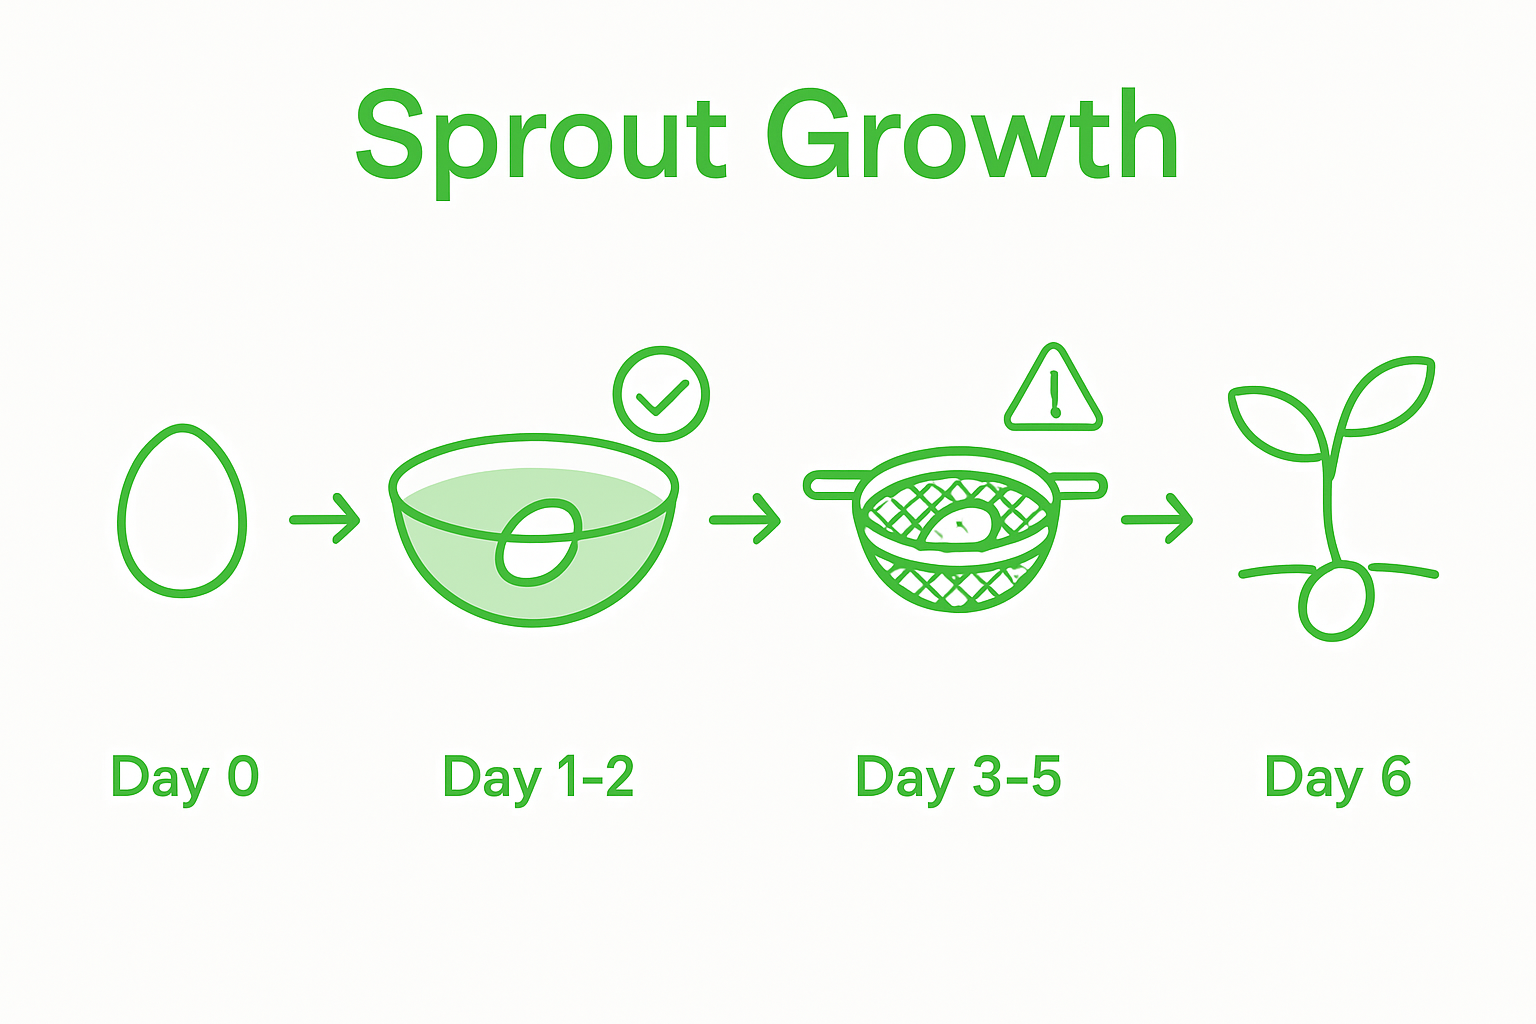
Once your sprouts have reached their peak, carefully remove them from the jar and perform a final rinse in a water filled bowl. This helps remove any remaining seed hulls and ensures your sprouts are pristine. Gently shake off excess water and spread them on a clean kitchen towel to air dry briefly. The goal is to minimise surface moisture without completely drying out the sprouts.
Warning: Trust your senses. Fresh sprouts should smell clean and earthy. Any sour, musty, or unusual odours indicate potential bacterial growth. Discard sprouts that appear slimy, discoloured, or emit an off putting fragrance.
With seasonal produce knowledge guiding your culinary adventures, your freshly sprouted seeds are now ready to add a nutritious punch to salads, sandwiches, and various dishes.
Discover Pure Nutrition with Organic Ingredients for Your Sprouts
Sprouting seeds naturally for maximum nutrition demands careful selection and hydration of pristine seeds free from chemicals. If you are passionate about nourishing your body with safe, wholesome foods grown mindfully at home, you will appreciate our commitment to organic and natural products across all categories. From fresh fruits and vegetables to clean dry groceries, our range helps you nurture vibrant health starting from the seed stage.

Experience the true essence of wellness by choosing ingredients that support your sprouting journey and overall vitality. Visit Nature’s Soul Shop to explore how our products align perfectly with your goal of cultivating nutrient-dense sprouts safely and deliciously. Start enhancing your kitchen and lifestyle today with products made for pure, natural living.
Frequently Asked Questions
What type of seeds should I select for sprouting for maximum nutrition?
Choosing untreated seeds specifically intended for sprouting is essential. Look for seeds that are free from pesticides or chemical treatments, and preferably sourced from reputable organic suppliers.
How do I rinse seeds properly before sprouting them?
Rinse your seeds under large volumes of potable water until the rinse water runs clear. Use a fine mesh strainer and gently agitate the seeds to dislodge any dirt or impurities, ensuring they are thoroughly cleaned.
How long should I soak seeds for optimal germination?
Soak most seeds for approximately 4 to 8 hours in lukewarm water between 20º to 35ºC. Make sure the seeds are completely submerged, as this hydrating process prepares them for successful germination.
How often should I rinse and drain my seeds during the sprouting process?
Establish a consistent routine to rinse and drain your seeds two to three times daily for 3 to 5 days. This regular maintenance keeps your sprouts fresh and prevents stagnant moisture, which can lead to mould growth.
How can I tell when my sprouts are ready for harvest?
Assess your sprouts after 2 to 6 days, looking for small shoots that measure 1 to 2 centimetres in length. When the sprout length is equal to the original seed size, they are typically ready to be harvested.
What signs indicate potential contamination in my sprouting process?
Watch for any unusual odours, discolouration, or slimy textures, as these are indications of potential bacterial contamination. If you notice any of these signs, it’s best to discard the batch and start fresh to ensure safety.
Recommended
- 7 Simple Indian Salads for Healthy Living and Wellness – naturessoulshop
- 7 Best Vegan Calcium Sources for a Healthy Lifestyle – naturessoulshop
- Regenerative Agriculture: Complete Guide for Health Seekers – naturessoulshop
- Complete Guide to Nutritional Yeast Uses – naturessoulshop
- Amazing soil-less farming – AMAZING GARDEN


